

Product Description
Dearlomum Retractable Baby Gate

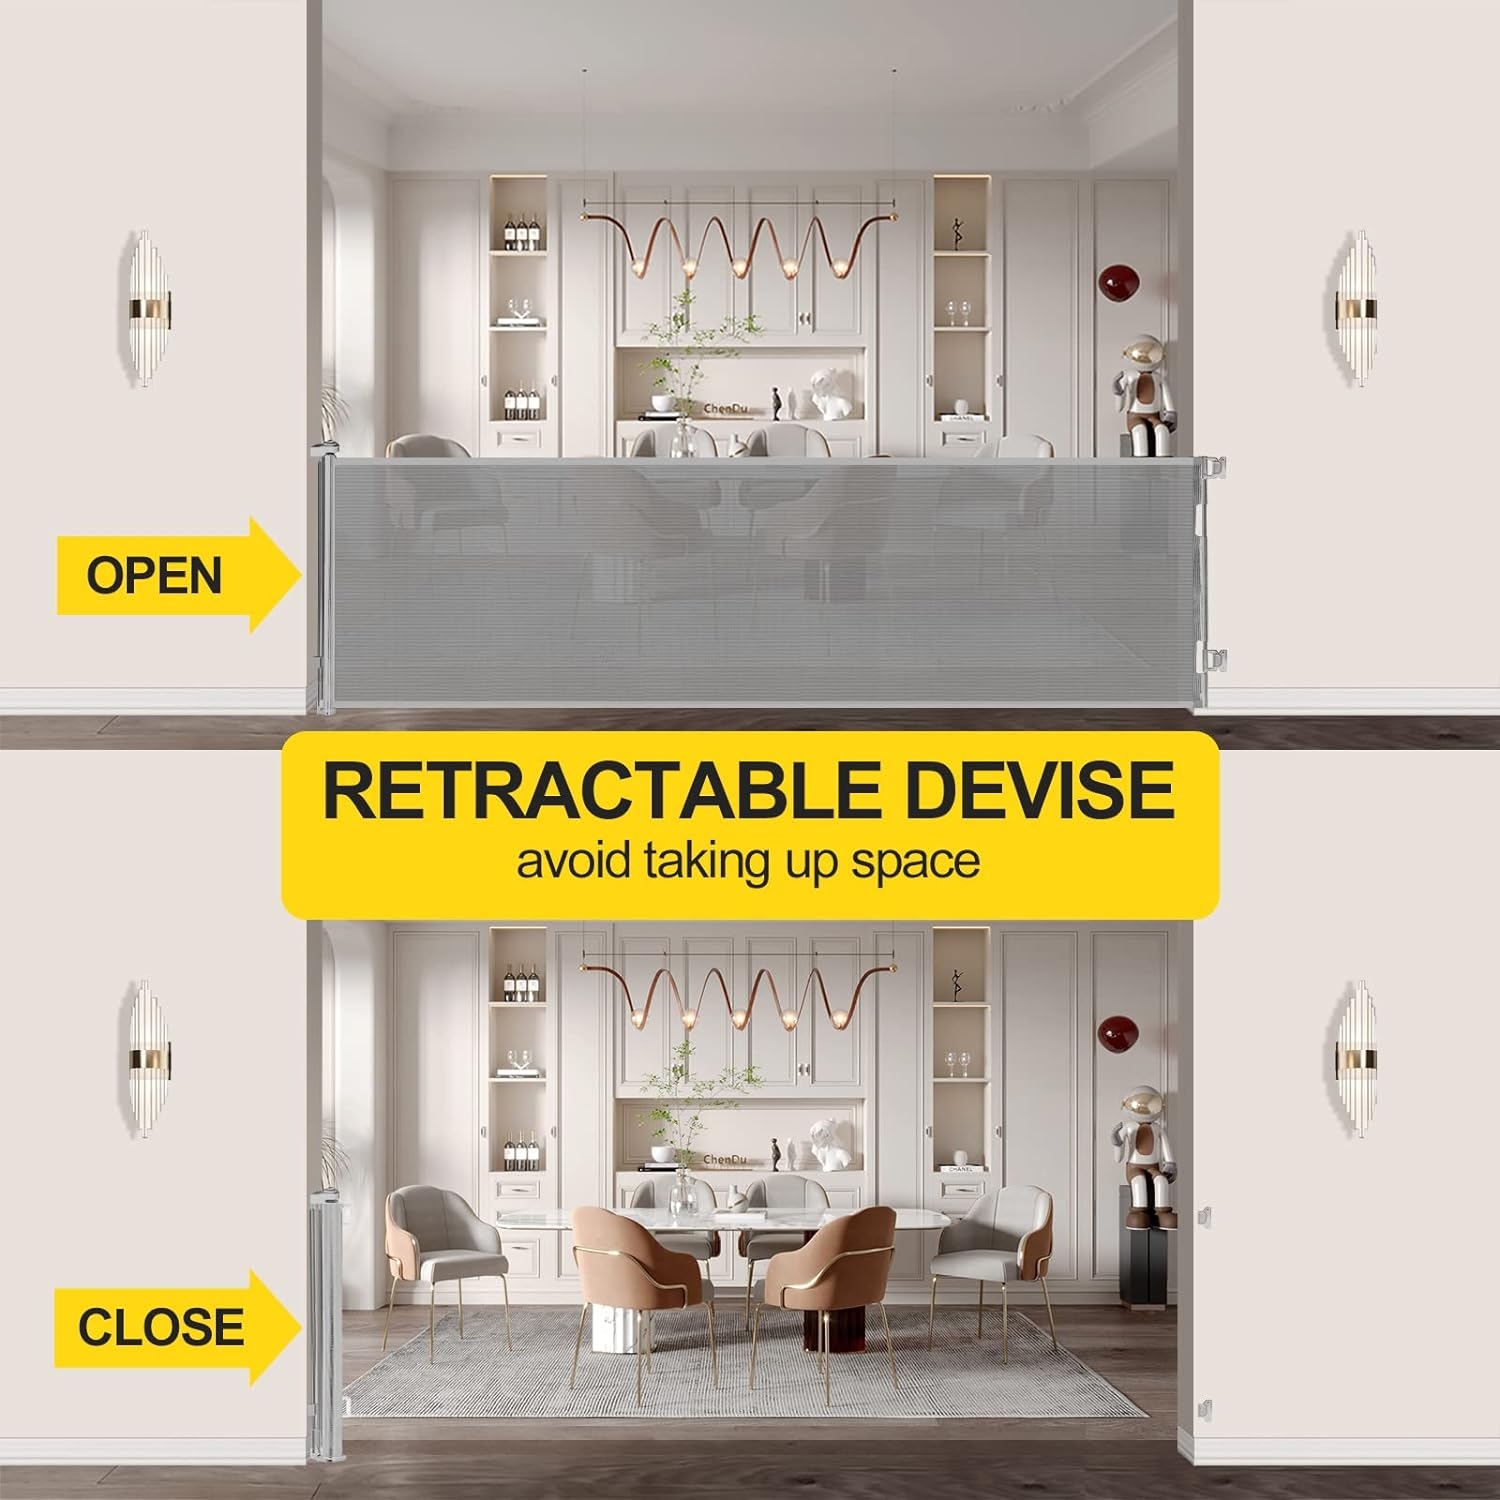
Suitable for use locations:


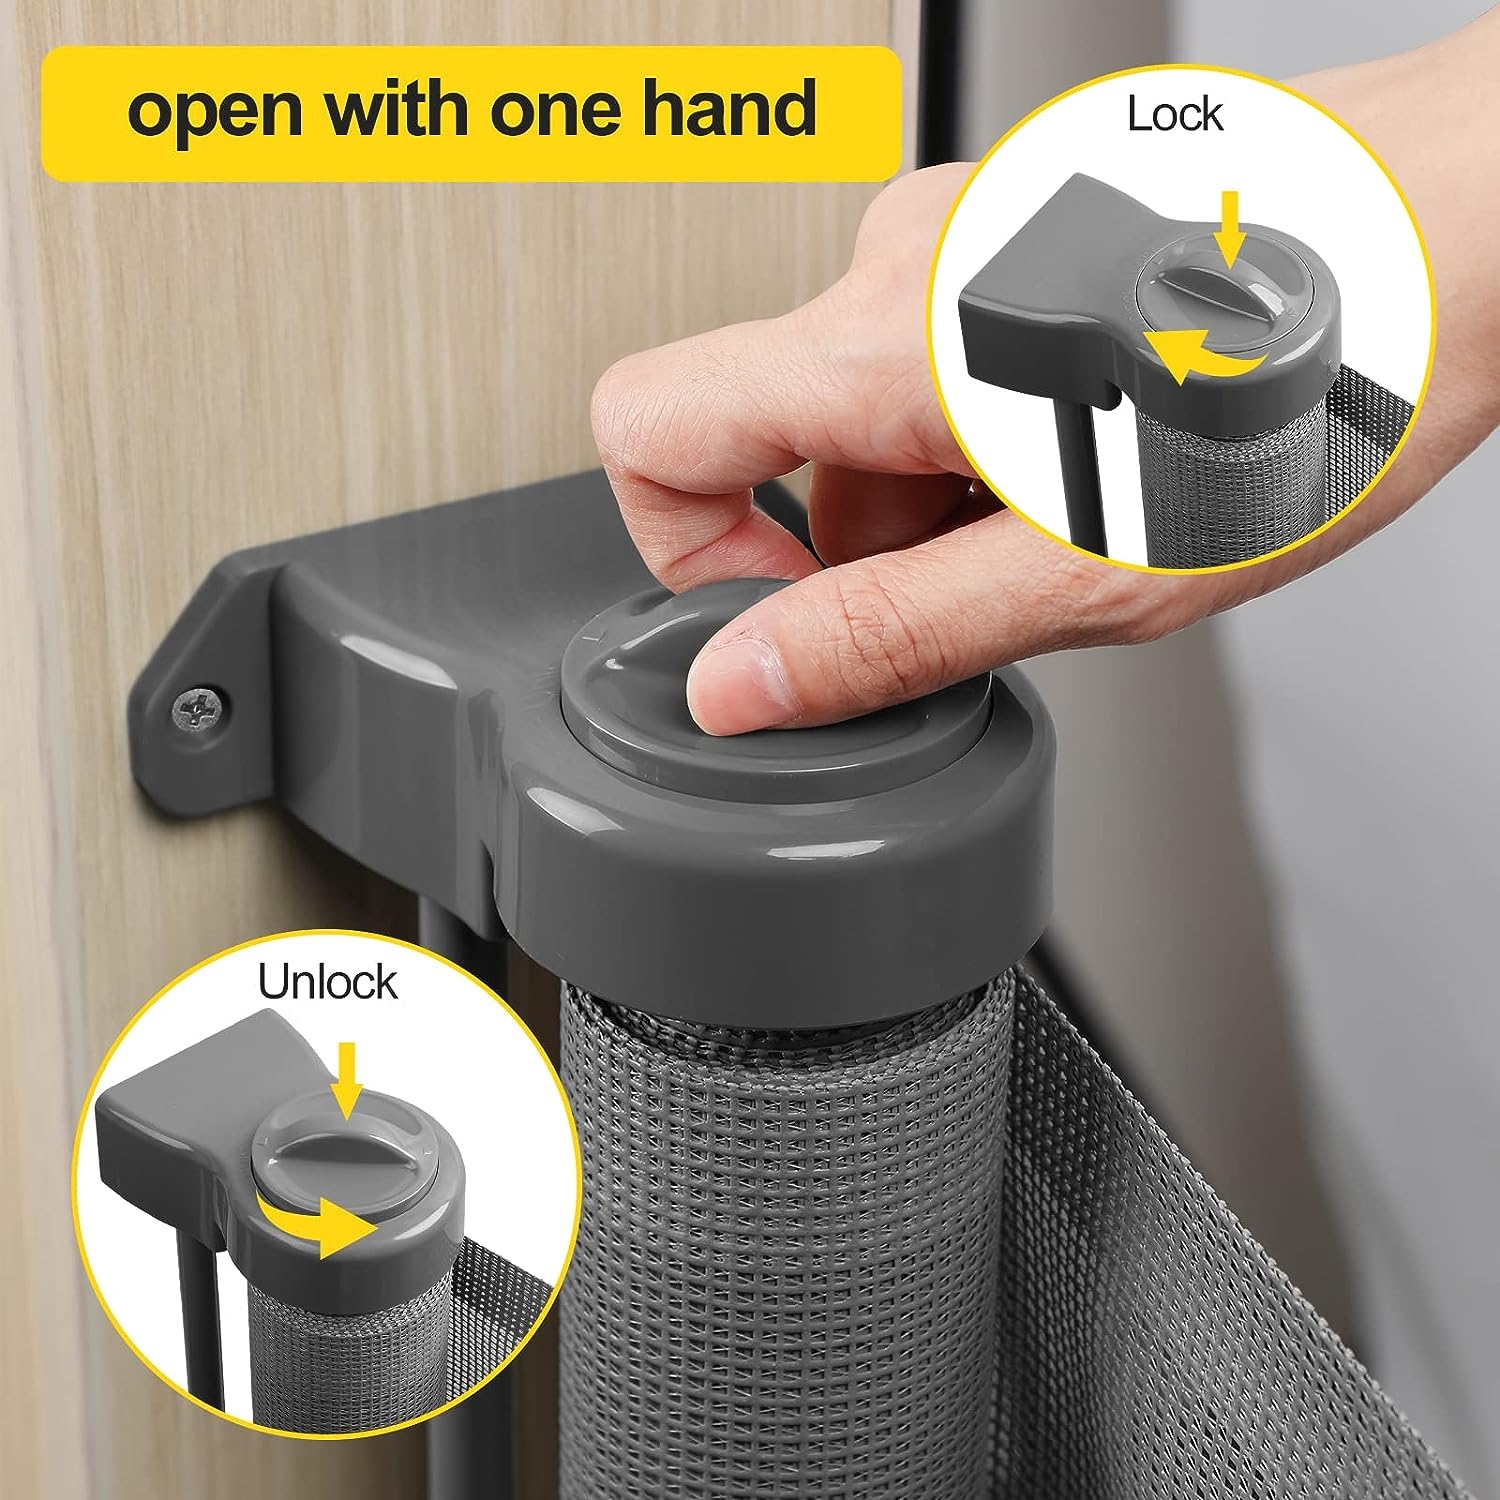
One Handed Operation to Open and Close the Gate

1.Press & Turn
Press and turn counter-clockwise to unlock gate.

2.Pull
Grasp handle to pull and hook handle onto catches.
Package List

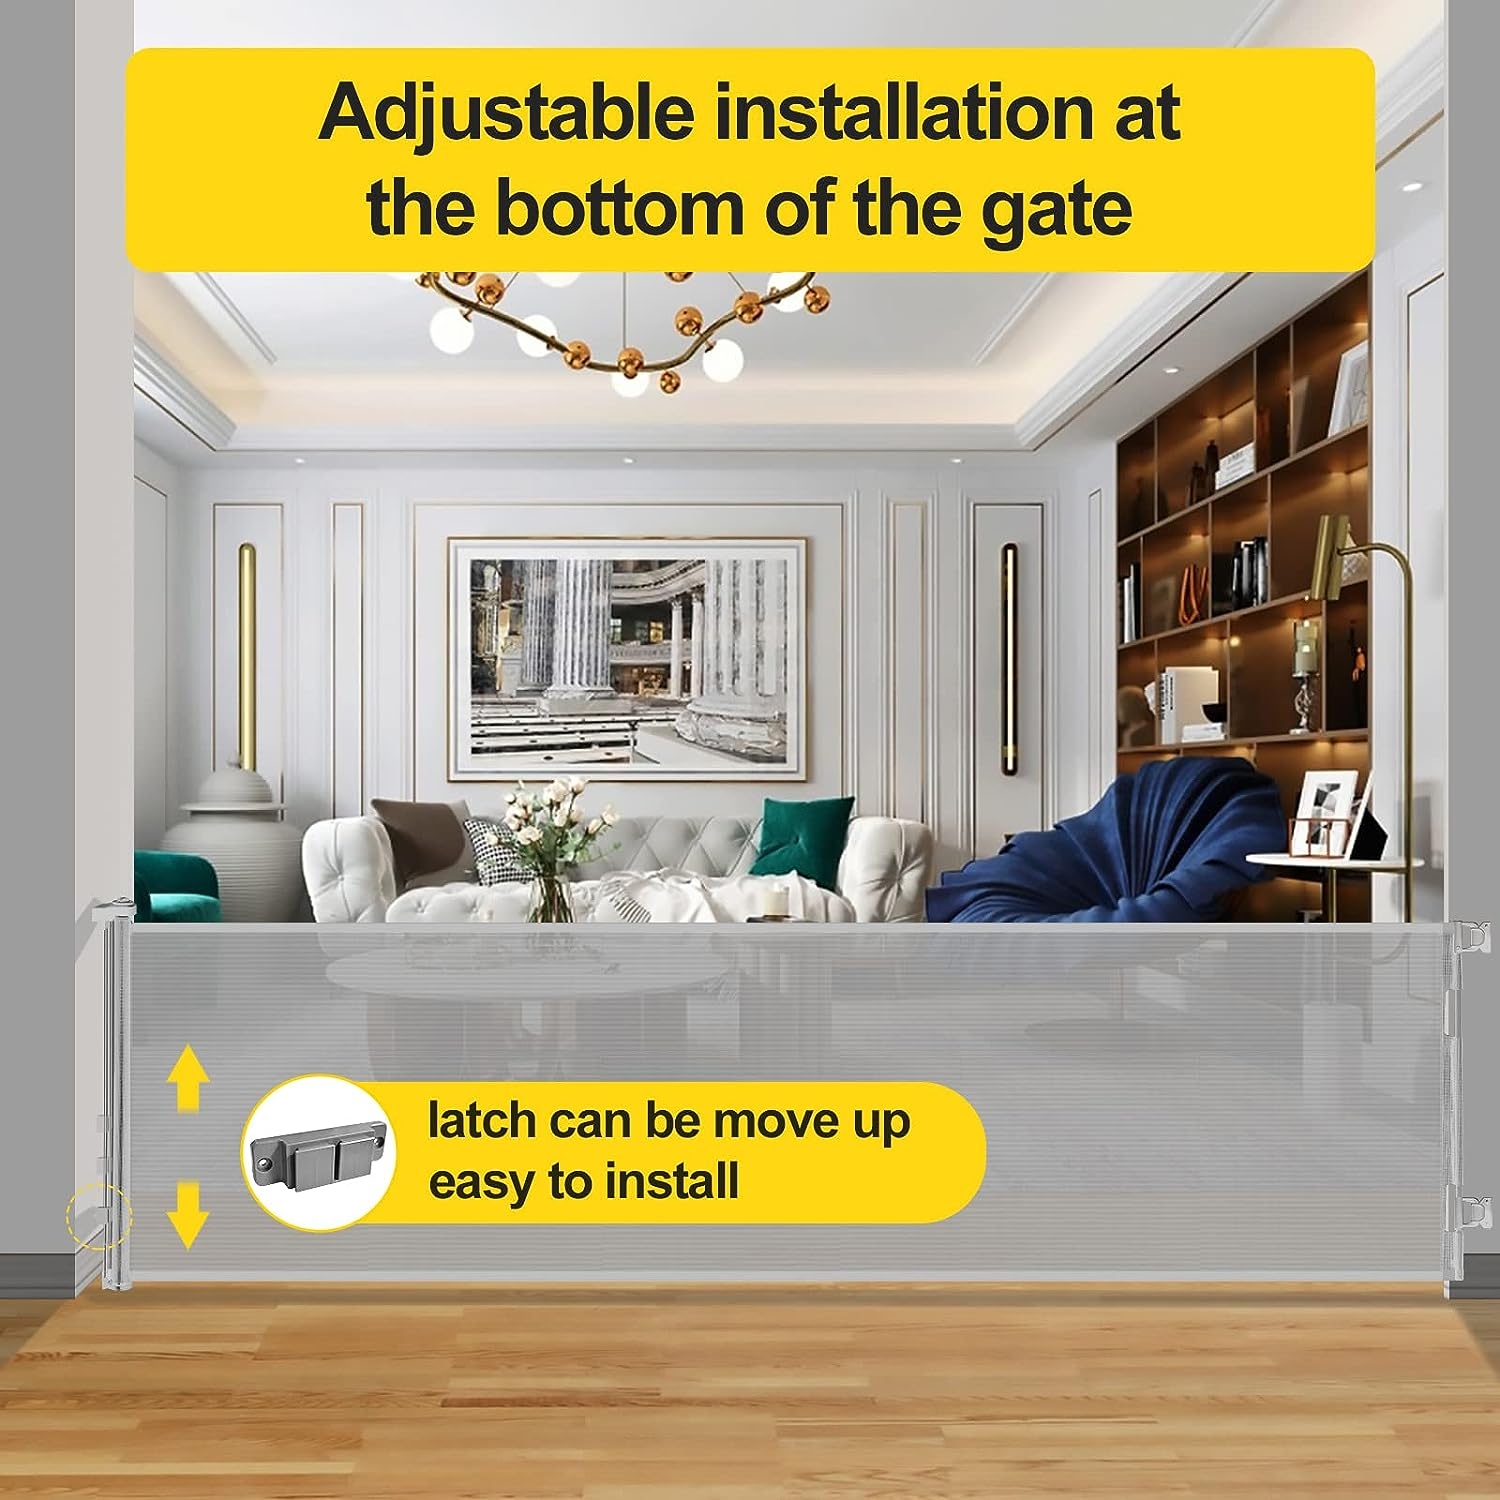
Easy to Install in Minutes

Step 1
Determine and mark the punching position.

Step 2
Drilling.

Step 3
Install and fix the upper and lower bracket.

Step 4
Lock the door and install it vertically downwards.

Step 5
Press&turn to “unlock” postion(anti-clockwise),stretch the mesh horizontally.

Step 6
Confirm the installation position on the other side and mark it.

Step 7
Clockwise and turn to lock the gate.

Step 8
Mark the position and drill holes to install the upper and lower brackets.
Important information
To report an issue with this product, click here.


 No products in the cart.